Canvas Model

PROJECT CANVAS

SHARE THIS CANVAS

0 0 0 0

The Project Canvas was designed by Jim Kalbach to help you to draw the big picture and visualize your project and develop a shared vision with all participants. It is composed of the key elements at the core of any design project.

Project Canvas's Creator

Jim Kalbach, Project Canvas Creator

Jim Kalbach

Jim is an active speaker, writer, and instructor on user experience, usability, and information architecture. He helped found local UX groups in Hamburg, as well as organize conferences in Germany and Europe. Jim is the author of the book “Designing Web Navigation”....

Learn More

Description of the Project Canvas

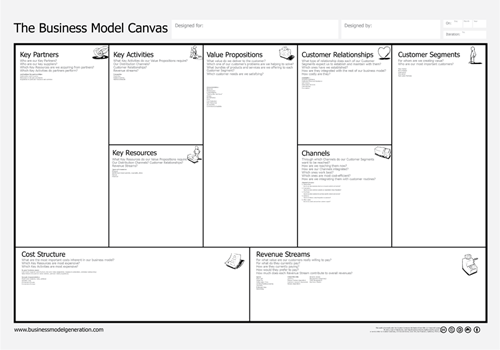
This Project Canvas is inspired by Alexander Osterwalder’s Business Model Canvas. However, the focus of this canvas is not on your startup strategy vision. This canvas helps you quickly portrait the key aspects of a design-related project accurately to increase its chance of success. Jim Kalbach created this methodology to help visualize projects, and to avoid deviations in the early stages of projects that can lead to exponential negative outcomes later on.


The visualization of your project allows for a better comprehension of the big picture and, as for other visual canvases, it makes the relationships project elements more visible than in lengthy written documents.


The 10 key elements of your project canvas are the:

  • Users

    The main target groups relevant to the project. This can be either a high level description, either a more detailed description.

  • User Benefits

    The concrete benefits for users when the project is successfully completed.

  • Goals

    he main project goals. Each goal can have its own associated success metrics written down as well.

  • Participants

    The project participants, including all people involved in the project. You can regroup them by groups, such as “core team,” ”stakeholders” and “interested parties.” Also use this box to show dependencies if needed.

  • Activities

    The key methods and approaches to be used on the project. (eg. User research, Persona development, Concept design, Wireframing, Creation of detailed mock-ups, User testing).

  • Deliverables

    Documents that will be delivered. It should only include deliverables stakeholders or other teams will see, as well as assets that appear in a product or service that customers may see.

  • Risks

    Potential future events that can have a negative impact on the project. When it is known, write down how you will mitigate them.

  • Milestones

    The key dates and events that frame the overall timeline of the project.

  • Constraints

    Overarching limitations on work products and processes, technology and platform constraints, and exceptional resource constraints. Time, money and other typical resources are part of all projects and don’t need to be written here.

  • Scope

    The scope of the project. List the features and functions that are in consideration on the project, but also what is NOT.

Methodology

Using the Project Canvas is an art, not a science. There is no right or wrong way to go about it. It's intended to help sift through disparate information about a project as is surfaces. Typically, this information may come from multiple documents, people and meetings, and it comes up at different times. Rarely is it all sorted and organized in a coherent way. The Project Canvas lets you capture information in any order as it becomes known but still keep the details structured.

Here are suggested ways to use the Project Canvas:

AS A CHECKLIST FOR AN INITIAL PROJECT BRIEFING

Before a project is even initiated, you may want to determine if and how your skills can best fit to what clients or stakeholders have in mind. In this case, use the Project Canvas as a checklist for yourself to ask all the right questions. For instance, if a new client calls and would like to engage you or your company, you can use the project canvas to diagnosis the overall conditions of their request.

Everything in one place as the conversation shifts. Here’s what to do:

  1. Create a new board and choose the Project Canvas

  2. Start by asking the motivation for the project and record that at the top.

  3. Then start with any of the boxes on the canvas, formulating each as a question. Ask: “Who are the participants of the project?” and “What are the goals?” etc. If the conversation wonders or comes to a lull, move on to the next box to put focus back into your interview.

  4. Time permitting, pry for deeper answers for each. Don’t accept vague answers, such as: “Our goal is to relaunch the website.” Follow up by asking “Why?” and “What’s the desired effect?” and so on.

  5. After the interview, summarize your notes from the canvas. In a separate document/board, create a list of bullet points organized by the same headers as in the Project Canvas.

  6. Reflect your notes back to the stakeholder and expand on them or iterate as needed.

In this way, you can move through the high-level details of a project with an interview partner in 30 minutes or less.

FOR GROUP DISCUSSION DURING A KICKOFF WORKSHOP

The visual nature of the Project Canvas makes it engaging for a group a people. Use the canvas as a way to guide a discussion about the project during a kick-off meeting. In fact, the structure of the Project Canvas can be used as the agenda for the meeting.

Try following these steps:

  1. Start a new Project Canvas before the meeting.

  2. Project it on a screen or via a large monitor so everyone in the room can see it. Invite remote attendees to the board so everyone can follow and participate along.

  3. Have everyone in the room introduce themselves and their role on the project. Record this information in the "Participants" box as you go around.

  4. Then discuss the motivation for the project and record that at the top.

  5. Start moving through the other boxes, asking each as question (i.e., “What are the project goals,” etc.)

Foster an open discussion to dig deeper on each, but don't get sidetracked too long on any one box. Move to empty boxes once agreement is reached to ensure you cover everything.

If there was a project briefing, you could pre-populate the details you already have on the Project Canvas. In this case, the group would expand on what is recorded, deepen the understanding of each, and come to a share agreement of the parameters of the project.

Using the Project Canvas in such a kickoff meeting takes anywhere from one to four hours, depending on the size of group and the amount of details known in advance.

FOR ONGOING REFERENCE

Additional details of a project often come out gradually. New risks can come to mind. Resourcing may get clarified and new participants named. Additional user benefits may arise previously not considered.

Keep the initial version of the Project Canvas around for a few days or weeks (depending on timelines) and fill out sections as new information comes to light. Once you get the sense that the project definition is stable, formulate the information to reflect out to the entire team. There two ways to do this:

  1. Capture information right on the Project Canvas. Clean up or modify the information on it and distribute it to others on the team. Hang a new printed version of the canvas in the office or project room for quick reference, or display it on a screen with TUZZit. This helps keep the defining elements of the project in sight at all times.

  2. In a separate document/board, list the information grouped by the headers from the canvas. You need not write more than several bullet points for each category. This keeps it short. Typically, a complete project definition document is no more than 2-3 pages. Store this on the project website or client extranet for quick reference.

Similar Canvases

Comments